

How to paint wall patterns
Available at

Colour is one way to express your personality, but patterns and shapes can do that too.
Whether you want to create a simple yet artistic mural for your child’s room, or make use of a large colour palette – patterns are much easier to create than you may think.
As with any DIY project, before you begin make sure that you’ve covered surfaces and used masking tape to protect fittings you don’t want to get paint on.
Geometric shapes
Geometric shapes are a great way to add variety and introduce bright or clashing colours in an organised way.
- Use strips of masking tape or decorators tape to make the outline of your shapes.
- Choose your colours. Clashing colours or complementing shades? Pick your shades!
- Dip half of your brush bristles in the paint.
- Paint the inside border first and then use a roller to fill in the rest.
- Repeat the steps for your second section.
- Apply the second coat after 2-4 hours.
- Remove the tape while the paint is still wet.
- When the paint is dry, put masking tape along the edge so it exposes the gap and fill it in.
- Apply a second coat once it’s dry.
- Remove the tape while the second coat is still wet and leave it to dry.
Polka dot
At first glance, the perfect polka dots look difficult to create and they certainly will be if you try it freehand! But actually, with this simple hack you can create a satisfying flawless circle.
- Grab a paint tin (or something else circular that’s the size of the polka dots you want), and draw a circle around it onto a piece of cardboard.
- Cut out the circle to create a stencil.
- Grab some decorators tape and attach the cardboard to the wall in the position you want your polka dot.
- Paint the circle with a small brush. Brushing paint inwards.
- Repeat with second coat after 2 hours.
- Carefully remove the cardboard and tape while the paint is still wet.
- Repeat the process until you have all the polka dots you want.
Mountains
Mountains are similar to zig-zags but you need three different complementing colours to create the effect.
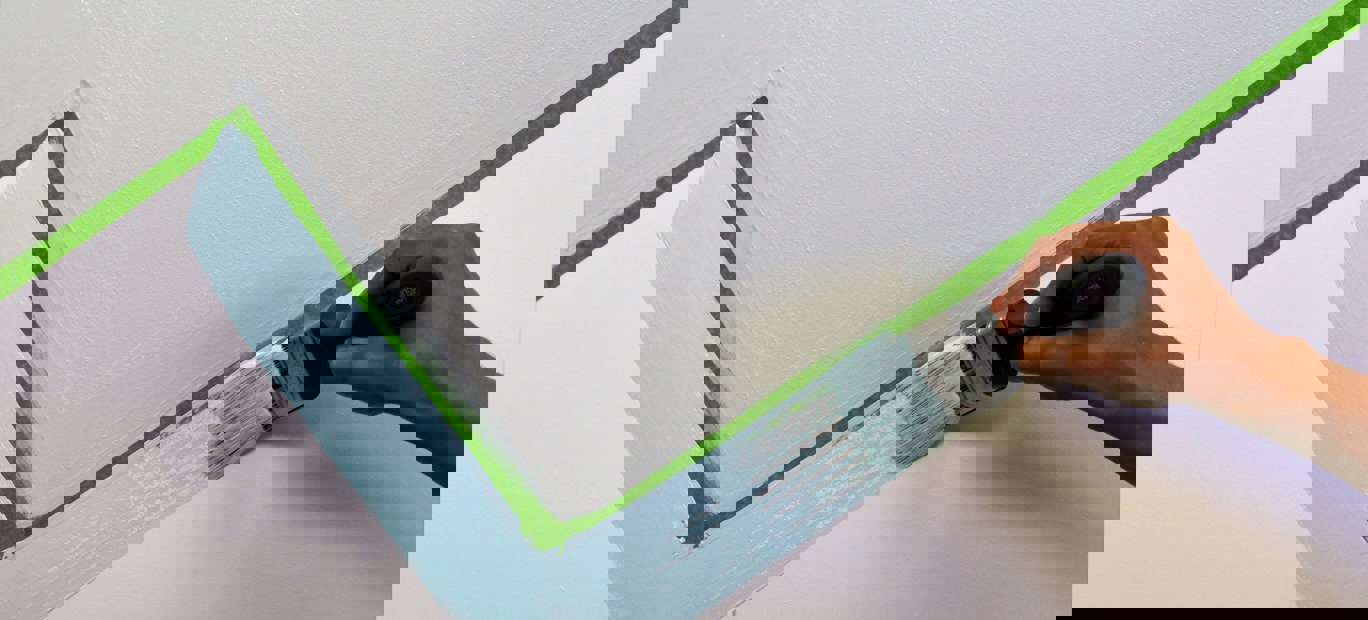
- Using decorators tape, mark out the lines of your mountain range.
- Using a 2” brush, paint the border against the tape inside the top section.
- Use a roller to fill in the rest of the area with the same colour.
- Choose another paint colour, grab a fresh brush and paint along the inside border of the second section and fill with a roller.
- Do the same with a new colour for the third and bottom section.
- Leave all three sections for two hours to dry and then repeat with a second coat for a solid colour.
- Remove the tape while your paint is still wet and leave it another 2-4 hours to dry.
- Apply tape along the now dry painted edge and fill in the gap with the right colour.
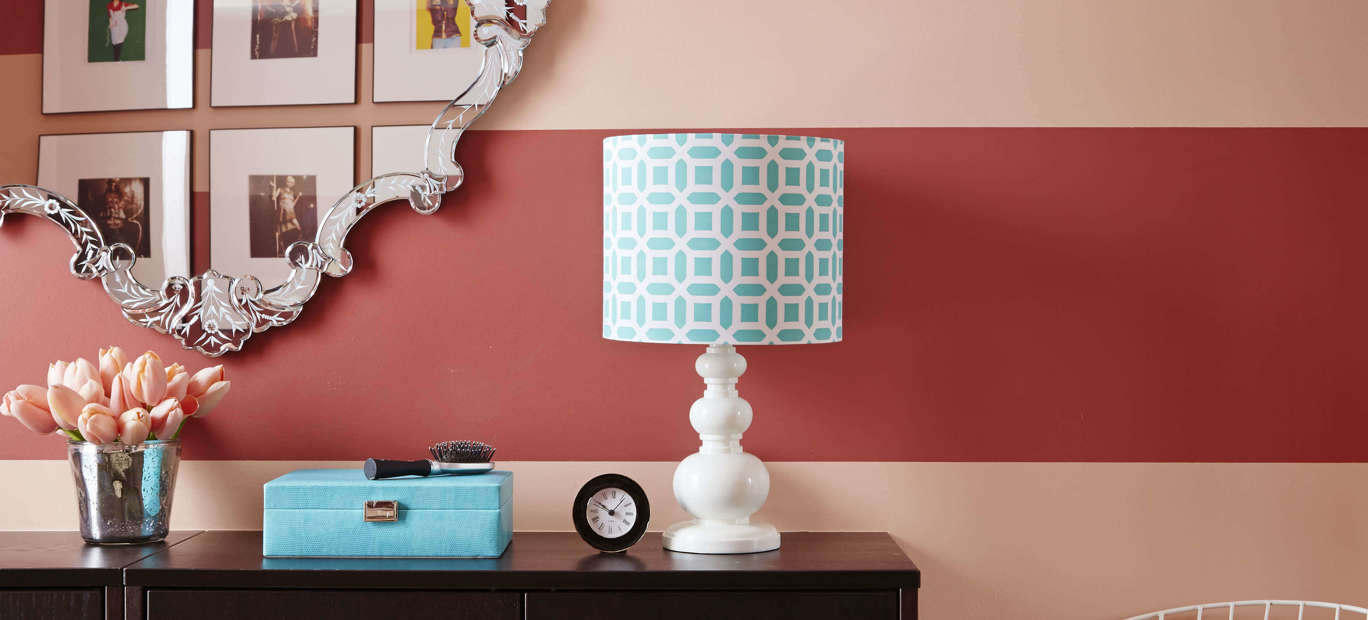
Stripes
Vertical stripes are really easy to paint as all you need is decorator’s tape.
- Arrange the tape in a straight line on the wall you want your stripes on.
- Pick your colour.
- Start painting.
- Remove the decorator’s paint while the paint is still wet.
Top tip: Use different shades of the same colour with chunky stripes for a contemporary look.
Zig-zags
Zig-zags are similar to stripes but instead of just a couple of lines of tape, you’ll need to use a few short strips to get your desired effect.
- Paint the inside border with a brush and fill in the rest with a roller.
- If you’re painting above and below the stripe, repeat the steps.
- Paint the border area first and then fill in the rest.
- Leave to dry for 2-4 hours and apply a second coat.
- Peel off the tape while the paint is still wet and leave to dry.
- Once dry, move the tape to the edge of your zig-zag and fill in the gap.
- Apply a second coat and peel off the tape while the paint is still wet.
Carriage Wheel
X99R208B
Dusky Twilight
R7B
In the Shadows
X133R280D
A Cappella
R278D
Gritty
X104R212A
White Pistachio
X144R283F
Premium Walls & Ceilings


BRING SOME COLOUR TO YOUR INBOX
Sign up to our Newsletter to get regular updates, inspirations and more!