
How to paint shabby chic
Available to order online at

Perfectly imperfect, shabby chic or distressed furniture is a lived-in look that’s full of character. You don’t have to bash your furniture around to recreate the style, and luckily it’s really easy to do yourself.
All you need is a piece of furniture, a variety of different grade sandpaper, furniture paint, a screwdriver, and clean lint-free cloths. And don’t forget your paintbrush or roller too!
Furniture paint inspiration
Before you can start to make your furniture look shabby, you need to paint it.
Here are a few ideas to get you started.
A modern, soft spin on a mid-century classic
Take a modern shade (in this case, Apricot Blush) and combine it with a classic piece of furniture for a style that stands the test of time.
Credit: Instagram - @northernsouls.littlehole

Apricot Blush
R97ASleek racing green with high-contrast colour pops
Painted in Galapagos green, this classic colour blends into most schemes helping you add personality in an unobtrusive way.
Credit: Instagram - @be_home_at_11 on Instagram

Galapagos
R259AA traditional inky black for a traditional piece of furniture
Honour the history of your furniture and pick a shade that reflects its purpose. Painted in Robin’s Hood, this writing desk will help unlock your creativity.
Credit: Instagram - @maisieshouse

Robin's Hood
L24dW48cBold black bureau for a big impact
High contrast colour schemes will always be a stylish bet, and this blue-black shade of Downing Street shows how it’s done.
Credit: Instagram - @our_crosspool_terrace

Downing Street
L17bW36dA green machine
How cute is this sideboard? This bright and bold Kensington Garden green is an injection of colour for a big pop of personality.
Credit: Instagram - @thepinkterrace

Kensington Gardens
L19dW38bWhat type of paint for shabby chic?
Whatever look you’re trying to create for your furniture, specialist furniture paint or chalk paint will get you there.
Our Furniture Paint goes on like a dream and is available in 2,000 hand-picked colours. But if you want to create something unique, you can get it colour matched too, giving you the option of 2.2 million colours to choose from.
The shabby chic part comes after you’ve painted your furniture.
How to paint shabby chic furniture
1. Protect the area
Work in a well-ventilated area (outdoors is perfect on a warm, dry day) and lay dust sheets to protect surfaces from splashes of paint. Taping it down will stop it from slipping around.
2. Prepare your furniture
The prep you do depends on the quality of your furniture.
If it’s an old piece with flaking, cracked or scratched paint or varnish, you need to get rid of the damaged sections.
Peel or gently scrape off as much flaking paint as you can. Then, sand down the whole piece of furniture with 120-grit sandpaper. Make sure rough areas are smoothed out, and there’s no more peeling paint. If there are small spots of damage, use wood filler to repair it and sand it down once dry, so it’s flush with the surface.
If the paint is in good condition or the furniture is brand new, prep still helps you get a great finish. In this case, just lightly sand the surface with 240-grit sandpaper.
For unpainted furniture, roughly sand it all over and repair any chips or cracks.
Remember, you should always wear a face mask when sanding!
Wipe it down with a damp cloth to get rid of the dust and give it a good clean to get rid of dirt and grease. Leave it to dry and vacuum up the remaining dust.
If there are any sections you don’t want to paint, use decorator’s tape to section off the areas.
Remove all the hardware like handles and put to one side; make sure you don’t lose the screws!
3. Prime
You don’t always need to prime. Check the instructions of the topcoat you’re using to be sure. Our Furniture Paint is a 3 in 1, which means it’s a primer, topcoat and finish all in one.
However, if you do need to use a primer, here’s how.
Give it a thorough stir. If you’re going for a dramatic colour change, use a shade of primer similar to the topcoat. For example, if you’re covering a dark blue with yellow, use a white primer. If you’re covering yellow with a dark blue, use a grey primer.
Dip in your brush and wipe off the excess on the rim. Apply the primer to the furniture, painting back and forth and slightly overlapping your strokes. Try not to spread the primer too thin. If you’re painting wood, make sure you paint in the direction of the grain for a smooth finish.
One coat should be plenty, unless you’re covering a bold colour then you may need two.
Let the primer dry.
4. Paint
Thoroughly stir the paint to make sure the colour is mixed, and apply the first coat. Use the same method to apply the paint as you did the primer.
Let the first coat dry, and then apply a second.
Remove the masking tape while the paint is still wet, and let your final coat dry.
Before you move to the next step, you need to wait seven days for the paint to fully cure. This means it’ll be tough enough to distress but won’t be completely damaged in a way that needs repainting.
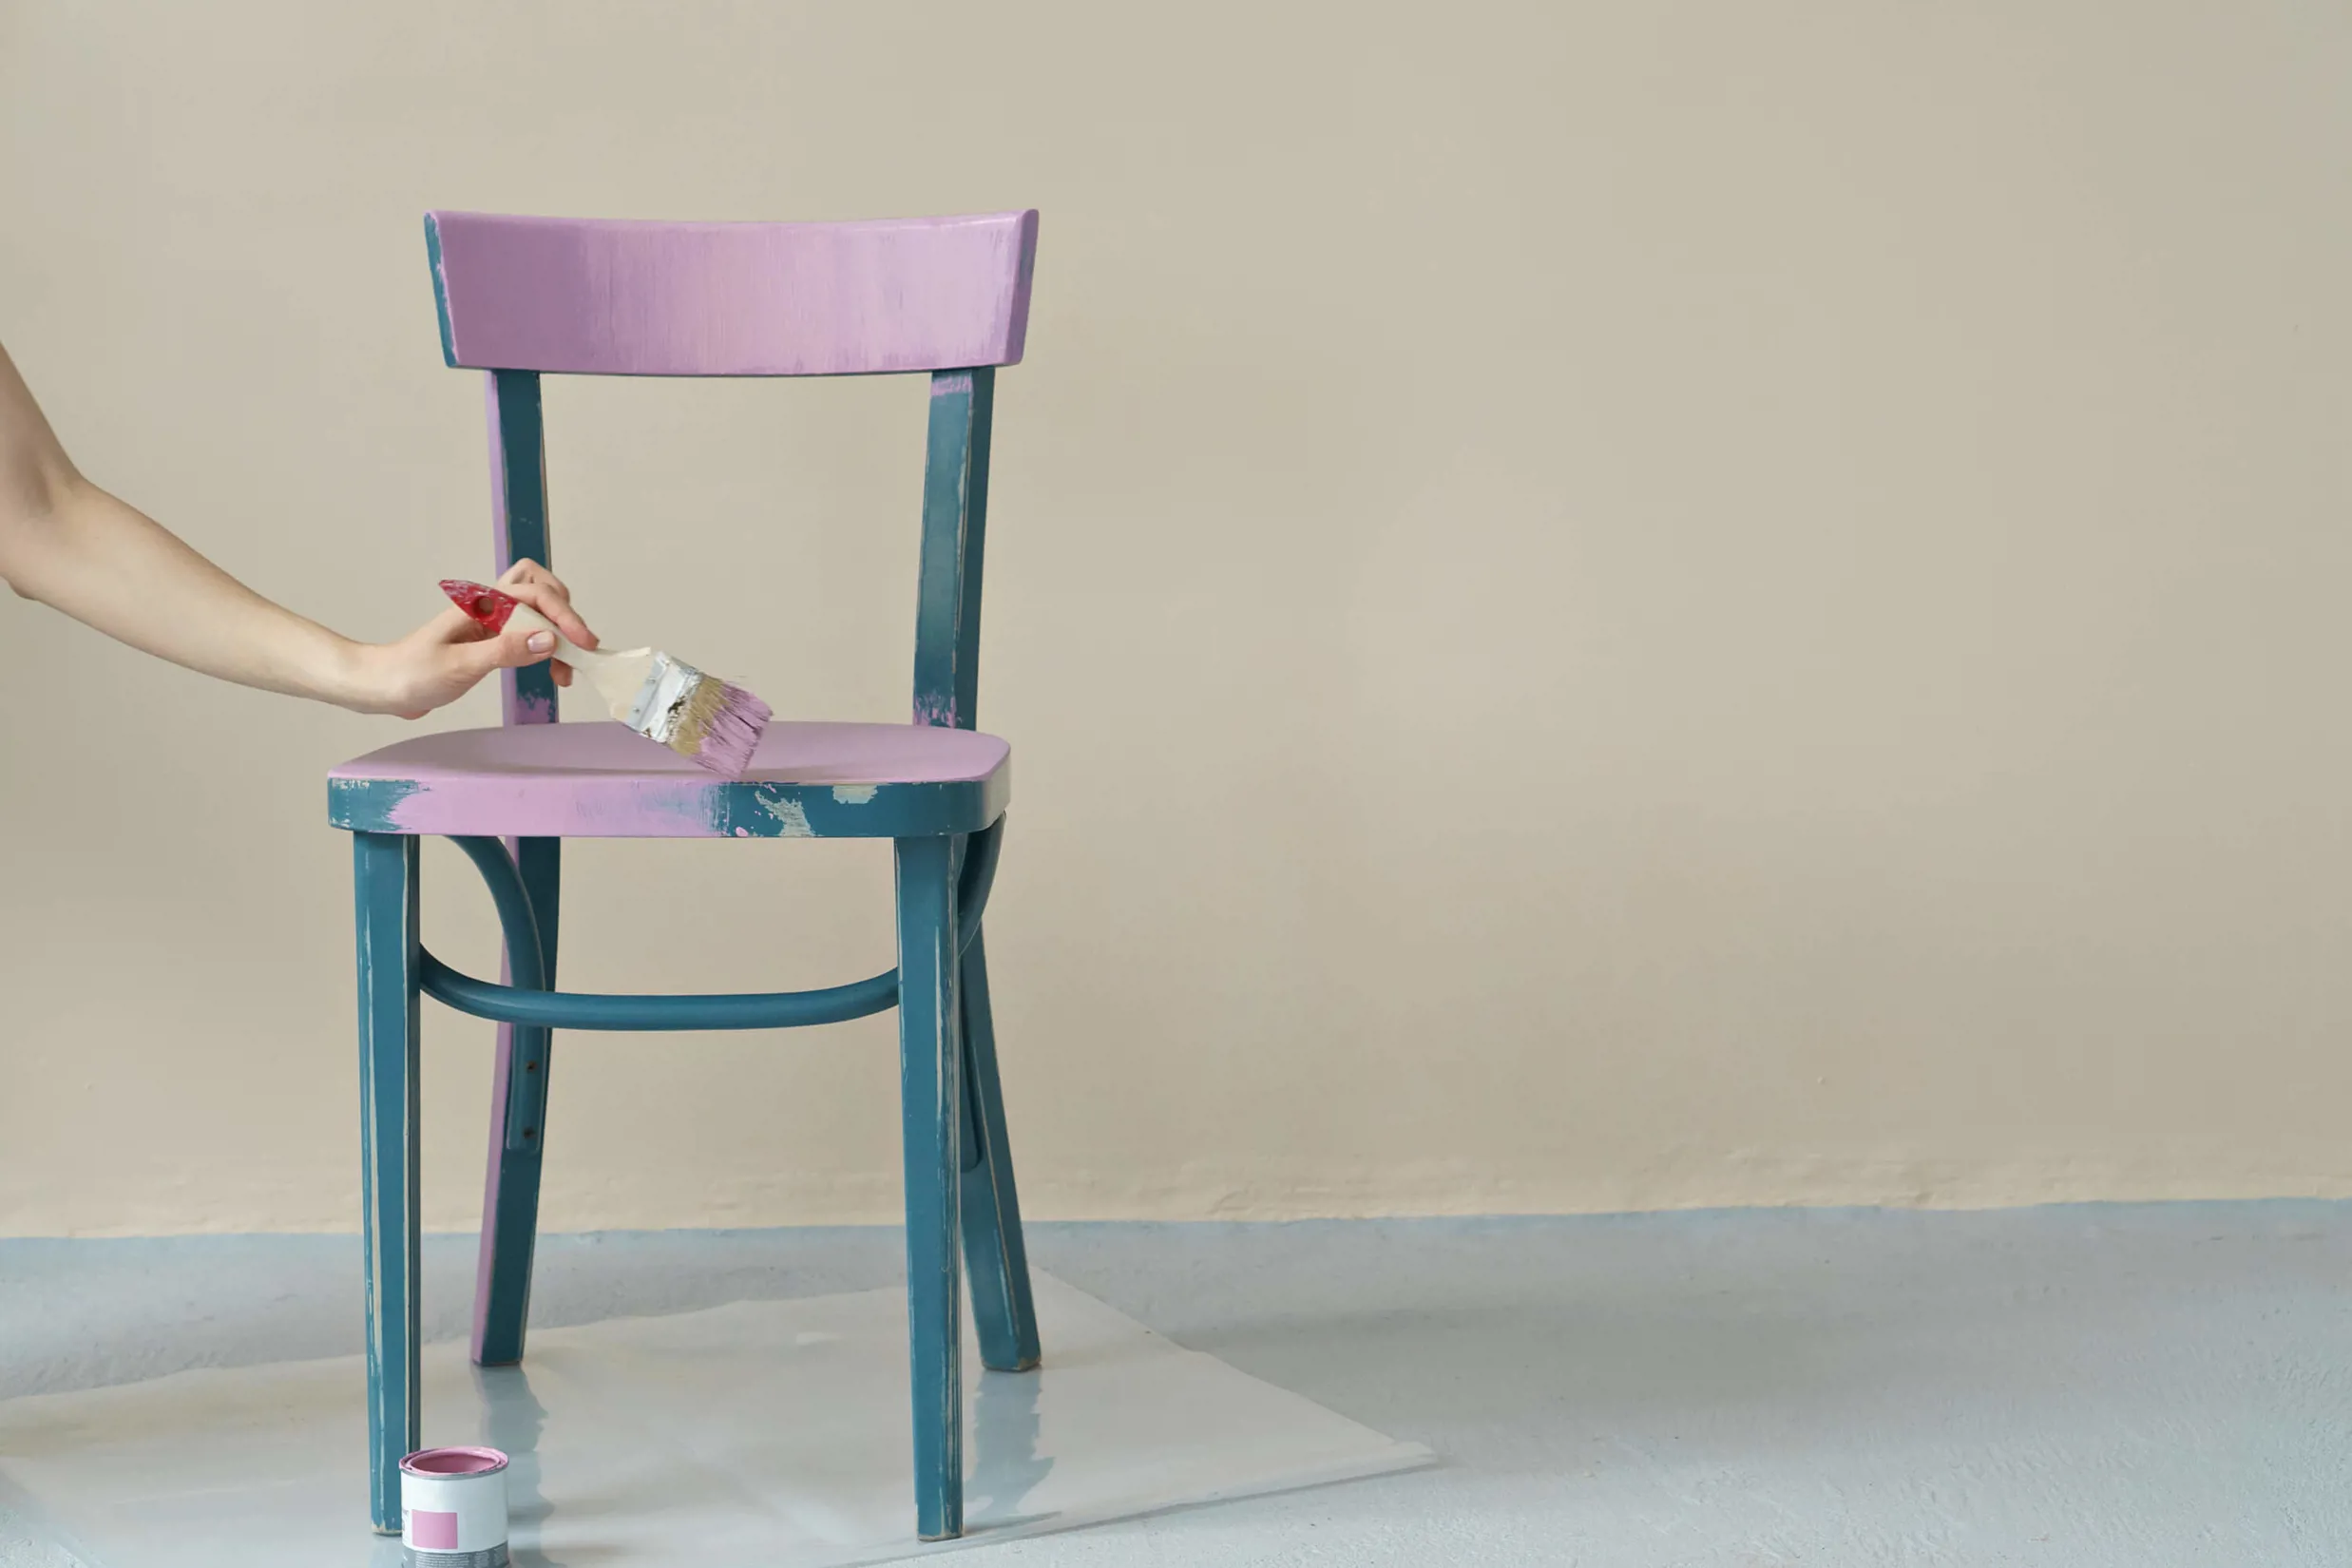
5. Distress
Use medium grade sandpaper (60 to 100-grit) and start sanding the paint to uncover hints of the wood underneath.
Think about the areas that would naturally wear, like corners and edges or around drawers and handles, and focus on these parts first. Sand until you uncover the wood.
If you want an all-over distressed look, use medium grit sandpaper and rub it all over until the wood starts to show through. Step back and wipe the dust away every now and then to see how your shabby chic furniture is shaping up.
Once you’re happy with how distressed your furniture is, use fine sandpaper (120 to 220-grit) and blend the paint in with the wood. This helps to create a worn look and makes sure the paint gradually fades around the exposed wood.
Give the furniture one last wipe down with a damp cloth and get rid of all the dust. Let it dry.
6. Protect
The bare exposed wood will need protection from damage or water. If you also used paint without a built-in finishing coat, there’s one final step in the process.
Use good-quality clear beeswax or furniture wax to protect the furniture. You could also use a clear varnish if you want a slightly shiny finish.
And that’s it! You’ve now got a lovely shabby chic piece of furniture.
For your next furniture project, browse our curated range of 2,000 pre-selected colours to find your favourite. You can order painted colour chips to your door, so you can see how the shades look in your home.


SIGN UP TO OUR NEWSLETTER
Sign up to our Newsletter to get regular updates, inspirations and more!